How to Draw a Coffee Mug: Simple Shapes, Proportions, and Shading
Reading time: about 10 minutes
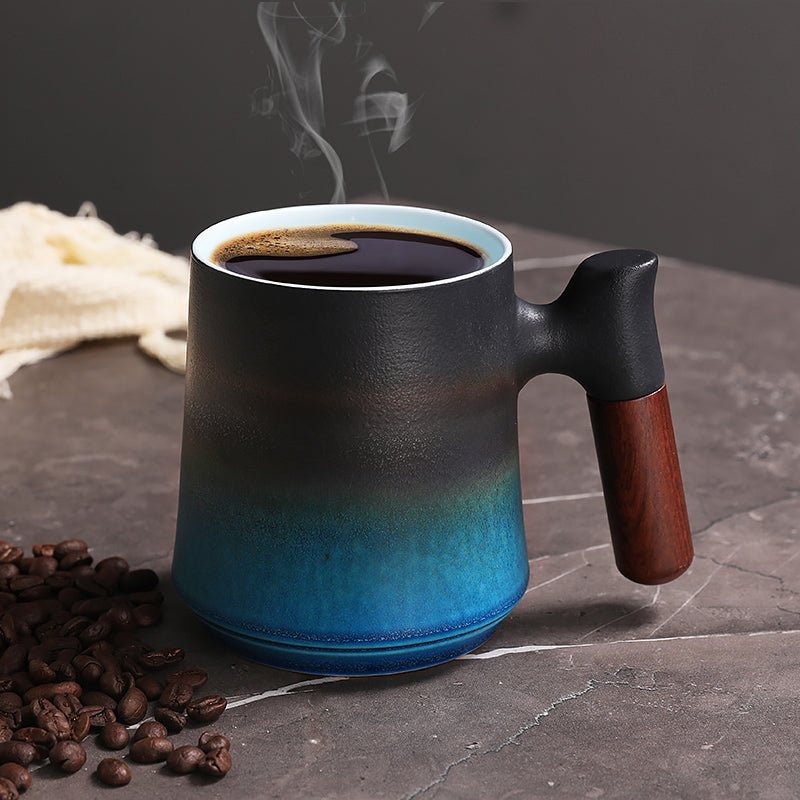
A mug is one of those objects that looks easy until the handle turns too small, the rim goes oval the wrong way, or the body feels lopsided on the page. We see that a lot in product photos and quick sketches, especially when someone is trying to draw a coffee mug from memory instead of using a real cup as reference.
If you want a clean result, start with the mug’s actual structure: a cylinder, a handle, a rim, and a base. That sounds simple, but the details make the drawing believable. In our store, we handle a lot of different mug shapes, from straight-sided daily mugs to taller, more decorative cups, and those differences change the sketch more than people expect. If you want to compare real shapes while you draw, our coffee mug collection is a useful reference point.
For readers who want a practical drawing example tied to an actual mug shape, the Rhombus Coffee Tea Mug is a good study in faceted geometry. A mug like that gives you sharper edges to observe than a plain round cup, which helps when you are learning how to draw a coffee mug with more confidence.
What should you sketch first when drawing a coffee mug?
Start with the body as a simple cylinder or slightly tapered cylinder. That gives you the main volume before you worry about the handle. We usually tell shoppers who are sketching from a reference to block in three shapes first:
- The outer body of the mug.
- The top ellipse for the rim.
- The handle as a separate loop attached to the side.
The most common mistake is drawing the handle first. It pulls attention away from proportion. The mug body should settle on the page before the handle goes on. If the mug sits at eye level, the top rim reads as a flatter ellipse. If it is lower than eye level, you see more of the opening. That small perspective shift changes everything.
Real mugs also have a base that is narrower than the body. On many ceramic mugs, the foot ring is subtle, but it still affects how the cup sits on a table. Even a tiny shadow under the base helps the mug stop looking like it is floating.
How do you get the mug proportions right?
Proportion is where most sketches fail. A coffee mug is not just “a cup with a handle.” The body height, width, rim thickness, and handle size all have to work together. A standard everyday ceramic mug often looks balanced because the body is wide enough to feel stable and the handle is sized for two or three fingers without crowding the sidewall.
Here is the way we check proportions in our store photos and product reviews when we compare shapes:
- Width vs. height: A short, wide mug looks sturdier. A tall mug feels lighter and more modern.
- Handle size: Too small and the mug feels cramped. Too large and the body looks underbuilt.
- Rim thickness: A thick rim reads as practical and durable. A thin rim feels more delicate and should be drawn with care.
- Foot/base: Even when it is minimal, the base needs enough width to suggest balance.
If you are sketching a taller silhouette, the White Golden Waves Tall Coffee Tea Mug is a helpful reference. Tall mugs need tighter vertical alignment. If the top ellipse and base are off by even a little, the whole cup feels unstable.
For a more compact shape, our Handbag Coffee Tea Mug is a very different study. It is not the mug style we would recommend for a basic beginner cylinder sketch, but it is useful if you want to practice unusual handles and silhouette decisions. That said, decorative shapes are less forgiving. If your goal is to learn fundamentals, a standard round mug is easier to draw first.
How do you draw the mug handle so it looks attached, not pasted on?
The handle should feel like it belongs to the mug body, not like a separate loop floating beside it. We always look at the attachment points first. On a real ceramic mug, the handle usually meets the body near the upper shoulder and lower midsection, not at random heights.
Try this sequence:
- Mark the top and bottom attachment points on the mug body.
- Draw a light outer curve for the handle’s outside edge.
- Draw the inner curve with enough space for fingers.
- Check that the handle thickness is consistent from top to bottom.
A handle that narrows too sharply looks fragile. A handle with a flat inner opening looks stiff and unnatural. In our experience, the best-looking handles in sketches have a gentle taper and a clear gap from the mug wall. Leave enough space so the handle feels usable. If a real person could not slide fingers through it, the drawing will usually look off.
There is also a practical trade-off here: some mugs have oversized sculptural handles that are beautiful in product photography but harder to draw cleanly. Those are not the easiest choice if you are just learning the basics.
How do you make a coffee mug look three-dimensional?
Shading is what turns a flat outline into a mug that feels present on the page. The trick is to think about light on a ceramic surface. Most mugs are glossy or semi-glossy, so the shadows are smooth, not scratchy. If you press too hard with the pencil, the surface can look dirty instead of reflective.
We handle enough mugs to notice a few common surface types:
- Glossy ceramic: Needs soft gradients and small highlight breaks.
- Matte ceramic: Takes flatter shading and less reflected light.
- Patterned glaze: Needs the mug shape established first, then decoration layered on top.
For a simple mug, shade the side farthest from your light source with a gentle gradient. Leave a narrow highlight strip on the lit side if the finish is glossy. Add a cast shadow under the base so the mug anchors to the table. If the mug is full of coffee, the liquid surface should sit as a shallow ellipse inside the rim, not as a flat circle.
If you want a practical companion guide after this one, our article How to Draw a Mug of Coffee: A Practical Step-by-Step Guide goes one level deeper into the coffee surface and steam placement.
Which mug details matter most if you are drawing from a real product?
Product details matter because they change the silhouette. A decorated mug is not the same as a plain diner-style cup. We see shoppers compare body shape, handle style, and finish more than they expect, and those same details matter in a drawing.
| Detail | What to look for in the sketch | Why it changes the drawing |
|---|---|---|
| Body shape | Round, tapered, faceted, or tall | Sets the overall silhouette and perspective |
| Handle style | Thin loop, chunky loop, sculpted loop | Affects balance and visual weight |
| Surface finish | Glossy, matte, or patterned glaze | Changes how light and highlights appear |
| Rim thickness | Thin or thick rim line | Influences realism and usability cues |
If you are comparing mugs for both drawing practice and real use, the best reference is often a mug you would actually keep on a desk or kitchen counter. A decorative piece may be fun to sketch once, but it may not teach you the proportions of a working mug very well. For shopping and comparison, our full mug collection is the fastest way to see different silhouettes side by side.
What are the most common mistakes when learning how to draw a coffee mug?
We see the same drawing issues over and over, and most of them come from skipping the structure stage. The mug looks close at a glance, but something feels off. Usually it is one of these:
- Perfectly round rim: A real mug rim is usually an ellipse unless you are looking straight down.
- Handle too small: This makes the mug feel cramped and awkward.
- Body and base misaligned: If the bottom is off-center, the mug seems unstable.
- Decorations drawn before form: Pattern lines should follow the mug’s curvature, not fight it.
- Hard outlines everywhere: This makes ceramic look like plastic.
Another frequent issue is ignoring the mug’s front plane. A straight-on view and a three-quarter view are not interchangeable. If you want an easier first pass, draw the mug from slightly above and at a small angle. That gives you enough ellipse to show depth without making the shape too complex.
And if the mug you are drawing has an unusual style, use a real-world reference that matches it. The Handbag Coffee Tea Mug is visually interesting, but it is not a beginner’s answer for learning standard mug anatomy. It is better as a later exercise once the basics are solid.
Should you draw a plain mug, a tall mug, or a decorative mug first?
For most people, the plain mug is the best first choice. It teaches the core form without extra distractions. A standard ceramic mug gives you the body, rim, handle, and shadow in a clean package.
Choose based on your goal:
- Plain mug: Best for proportions and basic perspective.
- Tall mug: Best for practicing vertical alignment and elegant silhouettes.
- Decorative mug: Best for shape observation and stylized drawing.
If you are sketching for a product idea, gift concept, or store listing mockup, you may want to study several styles at once. That is where a comparison page helps more than a single product page. We use that same approach in our own store work: compare the broad shape first, then narrow down to the exact style that suits the use case.
If you are also comparing capacity and day-to-day practicality, our size-focused posts can help you think beyond the drawing. See 12 oz Coffee Mug Buying Guide for Fit, Comfort, and Daily Use or 11 oz Coffee Mug: Size, Fit, and What to Check Before You Buy if you want a better sense of what a real mug has to do on a kitchen counter or office desk.
Frequently asked questions
How do I draw a coffee mug in perspective?
Start with a cylinder and turn the top and bottom into matching ellipses. The farther the mug is from eye level, the flatter the top ellipse becomes. Keep the handle attached to the same perspective angle as the body so it does not look pasted on.
What is the easiest way to draw a mug handle?
Draw the outer curve first, then the inner opening, and keep the thickness even from top to bottom. Place the attachment points on the mug body before you draw the loop. That keeps the handle from floating or shrinking too much.
How do I shade a coffee mug so it looks ceramic?
Use smooth gradients, not rough scratch marks. Leave a clean highlight on the lit side if the mug is glossy, and add a soft shadow under the base. Ceramic usually reads best with gentle contrast rather than heavy outlining.
Should I draw the coffee or the mug first?
Draw the mug first. The cup’s body and rim establish the shape of the drink container, and then the coffee sits inside that structure. If you start with the liquid, the rim and perspective usually end up uneven.
What mug style is best for beginners to draw?
A plain round mug is the best starting point because it has the clearest form. Tall, faceted, or decorative mugs are useful later, once you are comfortable with proportions. They are good practice, but they are not the easiest first sketch.
If you want to keep practicing with real shapes, compare a few styles side by side in our coffee mug collection, then pick the one that matches the silhouette you want to sketch next. For a straightforward follow-up, choose one simple mug and redraw it three times: front view, three-quarter view, and a slightly top-down view.
Read more
Stranger Things Coffee Mug Buyer’s Guide for Gifts and Daily Use
A practical guide to choosing a stranger things coffee mug that looks good on a desk, feels right in hand, and holds up to daily use. We cover size, material, care, and which styles make the best g...
Подробнее
Nice Coffee Mugs: How to Choose the Right Everyday Mug
A practical guide to nice coffee mugs for daily use, gifting, and desk coffee. We compare shapes, sizes, care, and real trade-offs so you can pick a mug that actually fits your routine.
Подробнее
Оставить комментарий
Этот веб-сайт защищается hCaptcha. Применяются Политика конфиденциальности и Условия использования hCaptcha.