How to Draw a Coffee Mug: Shape, Handle, and Shadow
Reading time: about 9 minutes
A coffee mug looks simple until the handle turns lopsided, the rim looks flat, or the cylinder starts to tilt in a way the eye can spot immediately. We see that all the time when people sketch from memory instead of from a real cup on a kitchen counter or desk.
If you want to learn how to draw a coffee mug in a way that actually reads as a mug, start with the object you would hold every morning. The best drawings usually come from observing a real mug, checking its ellipse, and paying attention to the handle and shadow rather than trying to outline a perfect circle.
For reference, our store’s mug shapes make the differences easier to see. A taller silhouette like our White Golden Waves Tall Coffee Tea Mug shows how height changes the body proportion, while a more unusual profile like the Handbag Coffee Tea Mug reminds you that not every mug is a plain cylinder. If you want to compare a range of forms before sketching, our full mug collection is a useful visual reference.
What shape should you draw first?
Start with the mug body before you touch the handle. The body is usually a cylinder with a slight taper, which means the top opening reads as an ellipse, not a flat circle. That one decision does most of the work.
We usually recommend building the mug in three parts:
- Lightly mark the overall height and width.
- Draw the top ellipse first, keeping the far edge slightly narrower because of perspective.
- Drop vertical sides down from the ellipse, then close the base with a second, smaller ellipse or a flattened bottom line if the mug sits low.
A common mistake is making the opening too round. On a real mug, the opening only looks circular when you are looking straight down into it. From table height, it flattens. If you want a cleaner example of why that matters, our article How to Draw a Mug of Coffee: Shape, Handle, Foam, and Shadow breaks down the full form with the drink inside it.
How do you draw the handle so it looks attached?
The handle is where most mug drawings fail. People draw a loop that floats beside the cup. A real handle has thickness, attachment points, and a slight gap that changes depending on the angle.
Draw the handle as a second form, not a line. Start with the outer curve, then add the inner curve so the handle reads as a tube or thick band. Keep both attachment points aligned with the mug body. If the mug is angled toward the viewer, the near side of the handle will look larger and the far side will compress slightly.
Three practical checks help a lot:
- The handle should usually land around the upper middle of the mug body, not at the very top rim.
- There should be a believable opening between handle and body unless it is a very unusual design.
- The handle thickness should be consistent unless the mug is intentionally sculpted.
Some mugs have oversized or decorative handles, and those are useful to study if you want to understand shape variation. A mug like our Rhombus Coffee Tea Mug is a good reminder that the handle and body do not have to look generic to still feel believable.
How do you make the mug look three-dimensional?
Once the outline is right, add light and shadow. A mug without shading looks like a flat icon. A mug with even a simple cast shadow starts to feel like an object sitting on a counter.
Think in terms of three zones:
- Light side: the side facing the light source stays cleaner and lighter.
- Midtone: the main body of the mug gets a soft middle value.
- Core shadow: the far side of the cylinder darkens slightly, especially where the form turns away.
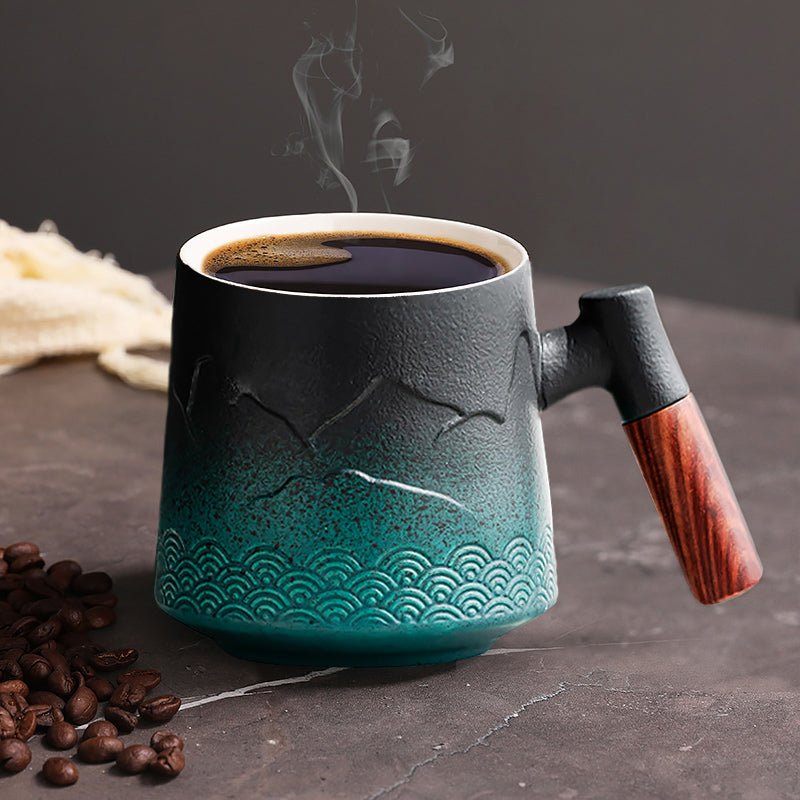
If your mug is glazed ceramic, leave a thin highlight along the curve. That narrow highlight helps sell the glossy surface. On a matte mug, the highlight is softer and less sharp. If the mug has a printed design or a metallic accent, the reflection can break up a little more, but the body still needs a clear value turn.
We see a lot of drawings go wrong because the shadow is treated as an afterthought. Keep the cast shadow attached to the mug’s base and let it stretch in the same direction as the light source. A short shadow on a bright kitchen table, or a longer one near a desk lamp, immediately tells the viewer where the mug sits.
What details make a mug sketch look believable instead of generic?
Small details matter because a real mug is not just a cylinder. It has a lip, a base, a glaze line, and sometimes a slightly uneven profile from the manufacturing process.
These are the details we pay attention to when we handle mugs in our store:
- Rim thickness: the lip usually reads thinner than the body, but not razor thin.
- Base shape: many mugs narrow slightly at the bottom or have a defined foot ring.
- Surface finish: glossy glaze reflects light differently from matte ceramic.
- Minor asymmetry: a perfect digital oval can feel artificial, while a subtle handmade irregularity can make the sketch more convincing.
Those differences are worth showing if the goal is realism. They also matter in real use. A tall mug may feel elegant on a desk, but it can be less stable than a shorter, broader shape. A novelty mug may be fun to draw, but it is not the best reference if you want to learn basic proportions first.
Which real mug shapes help most when you practice?
The best reference depends on the kind of drawing you want to make. If you are practicing standard product illustration, use a simple everyday mug first. If you want to challenge yourself, compare a tall form and a shaped form side by side.
That is why we like to show more than one silhouette in our catalog. The White Golden Waves Tall Coffee Tea Mug is useful when you want to study a taller wall and a narrower profile. The Handbag Coffee Tea Mug is better if you want to practice decorative contours. If you need a broader comparison across styles, our collection page is the fastest way to spot differences in handles, rims, and body shapes.
For shoppers who also care about size and fit, our mug size guides can help connect the drawing to a real purchase. The 11 oz Coffee Mug: Size, Fit, and What to Check Before You Buy article is useful if you want a common everyday reference, and 12 oz Coffee Mug Buying Guide for Fit, Comfort, and Daily Use is a practical comparison if you need a slightly larger silhouette.
What mistakes should you avoid when drawing a coffee mug?
There are a few failures we see over and over. They are easy to fix once you know what to look for.
- Making the top opening too circular instead of elliptical.
- Drawing the handle as a flat line instead of a three-dimensional form.
- Placing both handle joints too high or too low on the body.
- Skipping the base and letting the mug appear to float.
- Using the same line weight everywhere, which makes the form look stiff.
Another limitation: not every mug is a good beginner subject. Highly reflective mugs, heavily patterned mugs, and sculptural novelty mugs can be harder to draw cleanly because the reflections and decorations fight the outline. If you are just starting, choose a simple ceramic shape with one color and one clear handle. You will see the structure faster and avoid visual clutter.
How do you finish the sketch cleanly?
Once the proportion is set, darken only the lines that matter. The outer edge nearest the viewer can get a little more emphasis. The far edge of the ellipse should stay lighter so the opening does not look pasted on.
Then clean up the image in this order:
- Erase construction lines that are no longer needed.
- Refine the ellipse so it reads smoothly from front edge to back edge.
- Add the handle thickness and the attachment shadows.
- Place the cast shadow on the table or counter.
- Adjust line weight so the front contour reads first.
If you are drawing for product mockups, menu art, or a blog illustration, stop before over-rendering. Too much texture can make a mug look dirty or dented when you only meant to show form. A clean sketch often works better than a heavily shaded one.
Can you use the same method for coffee, tea, or travel mugs?
Yes, but the proportions change. A coffee mug usually sits wider and shorter than a travel mug. A tea mug may have a thinner, more delicate feel. A lidded travel mug adds another cylinder or cap shape on top, which changes the silhouette completely.
Our advice is to match your reference to the use case. A kitchen mug on a countertop is the easiest starting point. A desk mug with a straight wall is the next step. A novelty or sculptural mug should come later, after you can confidently draw the base form without guessing.
For buyers who care about everyday use as much as appearance, that trade-off matters. A dramatic shape may look interesting in a sketch, but a simpler mug is often easier to hold, wash, and stack. It is also easier to draw accurately because the geometry is less crowded.
Frequently asked questions
How do I draw a coffee mug for beginners?
Start with an ellipse for the opening, then draw the side walls straight or slightly tapered downward. Add the handle as a second form, not a flat line, and finish with a light shadow under the mug. If you can keep the ellipse believable, the rest usually falls into place.
Why does my mug drawing look flat?
Most flat-looking mug drawings are missing value changes. Add a light side, a midtone, and a small shadow where the form turns away from the light. A cast shadow on the surface also helps the mug feel grounded.
Should the mug opening be a perfect circle?
No. From most viewing angles, the opening should be an ellipse. It only looks like a perfect circle if you are looking directly down into the mug. A too-round opening is one of the fastest ways to make the drawing feel off.
What is the hardest part of drawing a mug?
The handle usually causes the most trouble because it needs thickness, spacing, and correct attachment points. If the handle floats or bends too sharply, the mug loses credibility. Sketch the body first so the handle can relate to a real shape.
Can I use a real mug as a reference?
Yes, and that is usually the best option. A mug on a desk or kitchen counter gives you real proportions, reflections, and shadow behavior. A plain ceramic mug is easier to study than a patterned or heavily sculpted one.
If you want a practical next step, compare one simple mug shape, one tall mug, and one decorative mug side by side, then sketch the same opening, body, and handle structure from each. Start with our mug collection, then check the product pages that match the silhouette you want to practice most.
Read more

Darth Vader Coffee Mug: What to Check Before You Buy
A Darth Vader coffee mug should do more than look good on a shelf. We break down size, shape, handle comfort, and everyday care so you can choose a mug that actually works at home or at the office.
Подробнее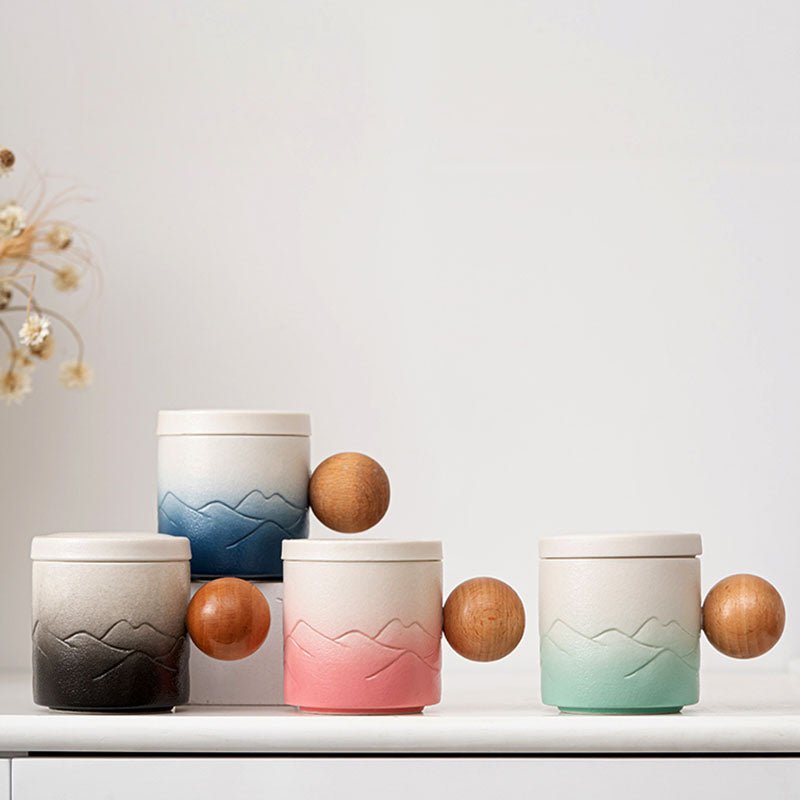
Extra Large Mug Buying Guide for Daily Coffee and Tea
Extra large mugs solve a real problem: too many refills, not enough desk space, and handles that feel cramped. Here’s how we help shoppers choose a mug that fits daily use, not just a shelf.
Подробнее
Оставить комментарий
Этот веб-сайт защищается hCaptcha. Применяются Политика конфиденциальности и Условия использования hCaptcha.