How to Draw a Mug of Coffee: Shape, Handle, Foam, and Shadow
Reading time: about 7 minutes
A mug of coffee usually goes wrong in the same place: the rim turns into a perfect circle, the handle looks glued on, and the coffee surface floats above the cup. We see that a lot when people sketch from memory instead of from a real mug on a kitchen counter or office desk.
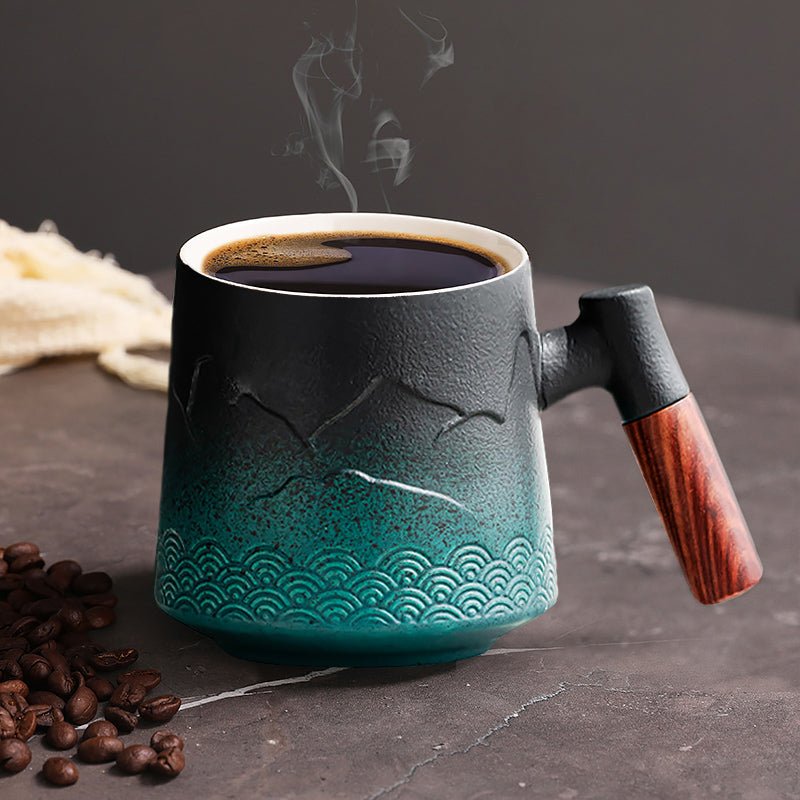
The fix is straightforward. Start with the mug’s silhouette, keep the ellipse honest, and treat the coffee as a separate shape inside the cup. If you want a real object to study, start with The Flow Coffee Tea Mug, compare it with Mountain Sea Coffee Tea Mug, and browse our full collection if you want a few different outlines on the same screen.
What should you sketch first?
Start with the cup body before you touch the handle or foam. That gives you a stable frame, and it keeps the mug from drifting sideways once you add the rest of the details. In our store, the cleanest mugs to sketch are the ones with a simple profile and a clear handle opening, because you can read the shape fast.
- Draw a light vertical centerline.
- Block in the mug body as a cylinder or a slightly tapered cylinder.
- Mark the top ellipse for the rim.
- Add the handle as a second shape, not as an afterthought.
- Place the coffee surface just below the rim.
If you sketch the handle first, the cup often ends up too wide or too narrow to support it. If you sketch the foam first, the coffee can hide the cup instead of sitting inside it.
How do you keep the mug proportions believable?
A believable mug depends on three relationships: the width of the rim, the height of the body, and the gap between the handle and the cup. The rim should read as an ellipse, not a flat oval or a circle unless you are looking straight down at the cup. The handle also needs air around it. If it touches the body everywhere, the drawing loses depth.
When you compare mug sizes, the silhouette changes more than people expect. Our articles on 10 oz Coffee Mug: Size, Fit, and What to Check Before You Buy, 11 oz Coffee Mug: Size, Fit, and What to Check Before You Buy, and 12 Ounce Coffee Mug Buying Guide for Daily Use and Better Fit are useful if you are matching your drawing to a real mug and want to see how a compact shape differs from a taller one.
- Keep the top ellipse narrower than the full body if the mug is angled toward you.
- Make the handle opening large enough for a hand, not a finger ring.
- Let the base sit flat, with a small cast shadow underneath.
- Keep the left and right sides parallel only if the mug is front-on; otherwise, let them taper slightly.
How do you draw the coffee surface and steam?
The coffee is not a flat brown disk. It sits inside the mug and follows the same perspective as the rim. If the mug is angled, the coffee surface should look like a second ellipse, usually a little smaller and slightly lower than the rim line. That small offset is one of the easiest ways to make the cup feel real.
Steam is optional, but it should never look like hair. A few soft, broken lines work better than heavy curls. We usually recommend keeping steam light and leaving some blank space around it so the top of the mug does not get crowded.
- Draw the coffee surface as a thin ellipse, not a thick band.
- Let a small highlight sit on the liquid if the light source is visible.
- Use only two or three steam trails if the scene is simple.
- Keep the steam lighter than the mug outline.
If you are drawing a takeaway cup or a lidded cup, this step changes. A paper cup has a different rim profile and a less visible liquid surface, so the same technique will not give you the right result.
What line work and shading make it read as ceramic?
For a typical ceramic mug, the cleanest result comes from controlled line weight and one clear light source. The side closest to the light should keep a cleaner edge, while the opposite side can take a slightly darker line. That contrast helps the mug round out without needing heavy shading.
We get the best results when the artist treats the mug as a solid object with a curved surface, not as a outline with fill. A bright highlight on the body, a darker interior at the handle opening, and a soft contact shadow under the base do most of the work.
- Use a slightly darker line under the rim to separate the lip from the body.
- Shade the inside of the handle opening so it feels hollow.
- Add a soft cast shadow on the table or counter to anchor the cup.
- Keep one side of the mug lighter if your light source comes from that direction.
A polished ceramic mug can also show a narrow highlight strip. Keep it narrow. If the highlight is too wide, the mug starts to look like plastic or metal instead of a simple kitchen cup.
What common mistakes make the drawing look off?
The same mistakes show up again and again, especially in quick sketches. Most of them come from treating the mug like a flat icon instead of a three-dimensional object. Here is the short version of what to watch for.
| Mistake | Why it fails | Fix |
|---|---|---|
| Perfect circle rim | It ignores perspective | Use an ellipse that matches the viewing angle |
| Handle attached like a sticker | The mug loses depth | Leave a visible gap and show the handle opening |
| Coffee line touching the rim everywhere | The liquid looks pasted on | Drop the coffee surface slightly below the lip |
| Heavy steam lines | The top of the mug gets cluttered | Use fewer, lighter steam marks |
| No shadow under the base | The mug floats on the page | Add a soft contact shadow |
Another common problem is a handle that is too thin. That makes the mug look fragile or oddly shaped. Keep the handle thick enough to feel usable, even in a stylized drawing.
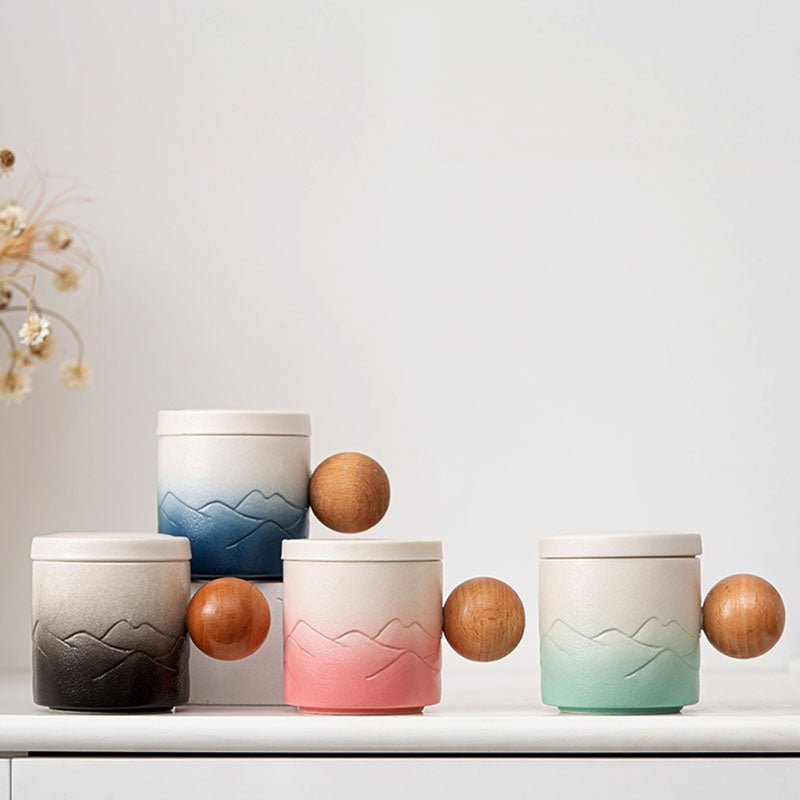
Which real mug shapes are easiest to use as reference?
If you want a reference that is easy to draw, pick a mug with a clean silhouette, a plain body, and a readable handle. Busy patterns can be useful later, but they slow down the first pass because they hide the form you are trying to learn.
That is where our product pages help. A simpler shape like Spittoon Coffee Tea Mug can be easier for a first sketch, while other profiles give you a different body line or handle angle to study. If you are choosing a real mug to place on a desk and sketch from, compare the shape first, then worry about the artwork on the mug.
Real-world practice is better than tracing a screenshot. Set the mug on a table near a window, step back a little, and sketch the silhouette before adding foam or steam. That is how the proportions stay honest.
Frequently asked questions
How do I draw the handle so it looks attached?
Draw the handle as a separate loop that connects to the mug body at two points, not as a flat arc sitting on top of the cup. Leave a small visible gap between the handle and the body so the opening reads clearly. If the mug is angled, let the back connection disappear a little behind the curve.
Why does my coffee mug look flat on the page?
Flat mugs usually come from a circle rim, no base shadow, and no change in line weight. Use an ellipse for the rim, shade one side slightly more than the other, and add a soft shadow under the mug. Those three changes are usually enough to give it volume.
How do I draw steam without making the cup look messy?
Use a few light, broken lines and keep them above the opening of the mug. Steam should feel loose and airy, not like a knot of scribbles. If the drawing already has a strong pattern or a busy background, leave the steam out and let the cup stay simple.
Should the coffee surface be visible from every angle?
No. If you are looking at the mug from the side, the liquid may be barely visible or hidden behind the rim. If the view is from above or slightly above, the coffee surface becomes a clear ellipse inside the cup. Match the liquid shape to the angle of the mug, not to a fixed template.
What is the easiest mug to draw for practice?
A plain mug with a simple handle and minimal surface detail is easiest. It lets you focus on proportion, ellipse shape, and shadow placement before you add texture or decoration. That is the fastest way to build a mug that looks believable.
If you want a real object to sketch next, start by comparing a few shapes in our full collection and pick the mug with the cleanest silhouette. A simple body, a readable handle, and a clear rim will give you the best practice setup for learning how to draw a mug of coffee.
Read more
Coffee Mug 20 oz: How to Choose the Right One for Daily Use
A practical guide to choosing a coffee mug 20 oz for daily coffee, tea, or gifting. We cover fit, heat, care, trade-offs, and which of our mugs makes sense for desk use, kitchen shelves, or a gift ...
Per saperne di più
Fall Coffee Mug Buying Guide for Cozy Daily Use
A practical guide to choosing a fall coffee mug that fits your pour, feels comfortable in hand, and still works after the season changes.
Per saperne di più
Commenta
Questo sito è protetto da hCaptcha e applica le Norme sulla privacy e i Termini di servizio di hCaptcha.